1.Baby Shay:
Several months ago I spent some time looking at articles in back issues of the Narrow Gauge and Short Line Gazette about the T-Boiler Shay engines. I wondered at the time why they never made a one cylinder version.
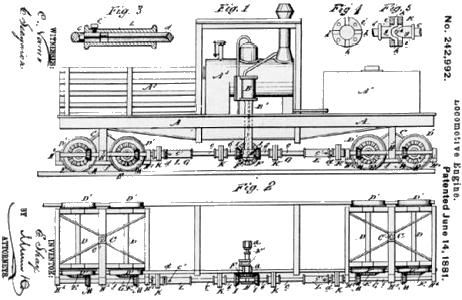
I happened to find the old Patent drawings for the Shay. This is one of them:
I asked at my local train store if their was a prototype for a one cylinder Shay? The answer was that they didn't think there was. Their collect thought was that a one cylinder version might work but it would not be very effective. Two or three cylinder versions, however, were very effective.
Time passed and last week I was looking at the October 2008 issue of Garden Railways magazine. I look at most of the train model magazines each month and buy a few if they have an article of interest to me.
To my surprise I found my one cylinder Shay prototype. A modeler named Jerry Barnes had built a "G" scale one cylinder Shay for his "Spring Creek Railroad". I did a internet search for the "Spring Creek Railroad" and found a very nice web site. Jerry has a really nice "How-To" for his one cylinder Shay.
http://thescrr.com/shay.html
I discovered also that Jerry had built several "G" scale McKeen's. He has a brief "How-To" article in the August 1997 issue of the Garden Railroad magazine. I had bought that issue a year or so ago when I was gathering my McKeen reference material. Small world.
The McKeens are about 6 down on this page:
http://thescrr.com/rollingstock.html
I was able to talk to Jerry on the phone and he sent me a few more photos of his one cylinder Shay.
Now that I have a prototype for a one cylinder Shay I went to work.
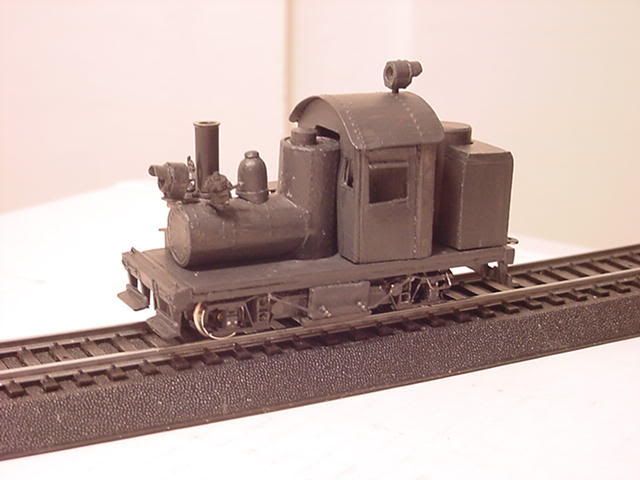
My "Baby" Shay would be built first in HO scale, one or more, and then maybe also in HOn3.
The "Baby Shay" will be a combination "Kit-Bash" of a few parts from both MDC and Keystone Shay kits and a big dose of scratch built parts.

To figure out how to make a one cylinder steam thing I first built a two cylinder that came in a Keystone Shay kit I have. I then took another two cylinder motor and modified it to a one cylinder. Keystone sold these two cylinder kits and Caboose Hobbies or Walthers may still have some. I bought 5 or 6 from Caboose Hobbies on sale. I bought all they had. I made 3 different one cylinder Keystone versions. They didn't stayed glued together very well.
I didn't really like the Keystone versions. I got out all my pictures of two cylinder Shays and found one I liked. I made a cardboard version to get the size correct. I started one in Styrene this afternoon. I think I spent 40 or so hours on the Keystone versions so I hope the Styrene version goes faster.
===========================================
2.
Yes, it will be a working model. Not like Jerry's as his is a lot bigger. The "working" part is taking a bit of imagination as this Shay is very small.
It will have a Micro-Tsunami DCC with Shay sound, a NWSL motor, one of the new 1" square Bass Reflex Speakers from Railmaster Hobbies and LED's for lights .
http://www.railmasterhobbies.com/Speakers.htm
You can see the speaker in one of my pictures. The RailMaster speaker comes ready to use with a built in enclosure. They also sound great. The speaker will be built into the small oil tank on the rear of the Shay. I am also building a small tender like piece of rolling stock for extra water and more oil to go with the "Baby Shay".
I have the power unit and speaker and the Micro-Tsunami decoder is on order at my local train store.
I hope to be working on the Shay drive system this weekend.
================================
3.
I am slowly making a bit of progress on the Baby Shay. I need a bunch of detail parts and will call an order in this afternoon to Precision Scale Co (PSC). They have all the parts I need but they are really slow to get an order together and ship. I know it could will be several weeks before I see my order. I got a bunch of PSC parts from Caboose Hobbies this week but they didn't have everything I wanted.
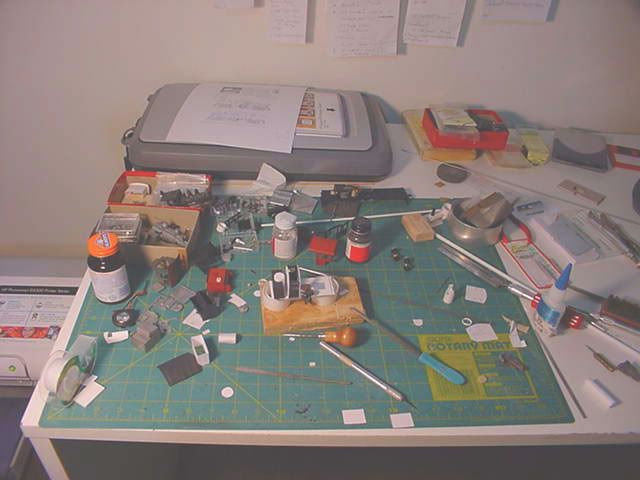
1. Work Bench.
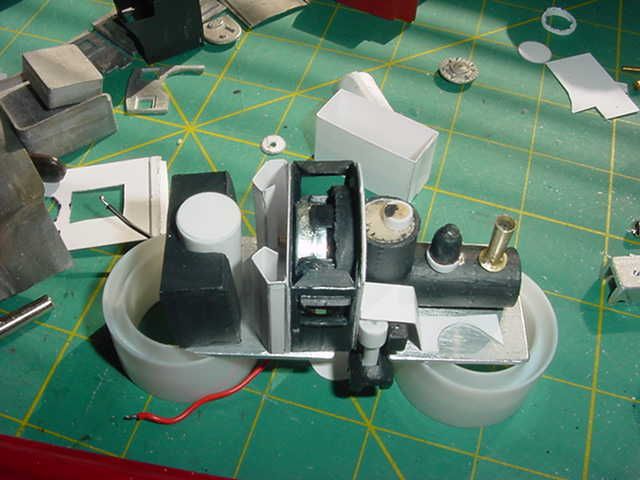
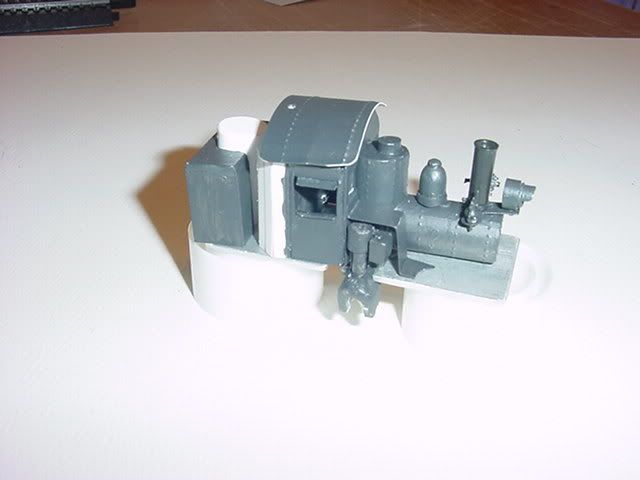
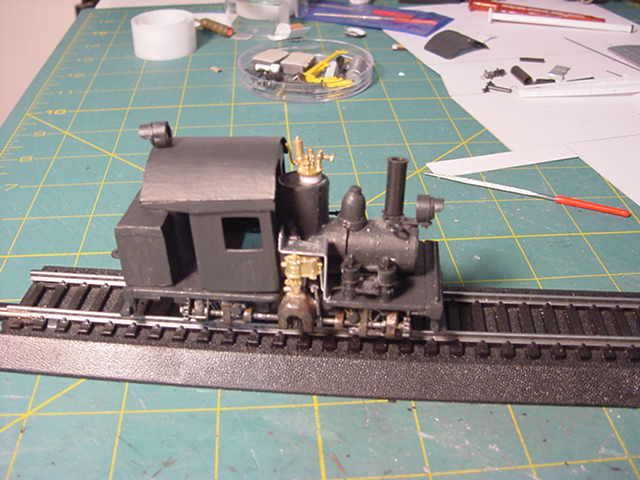
2. Making T-Boiler.
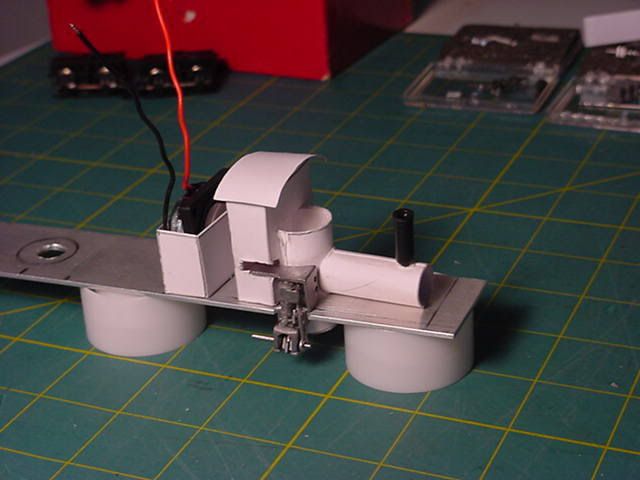
3. Making slow progress. If you look close you can see the top of the small speaker standing up in the cab.
=======================
4.
I added up the cost for the parts I wanted and it came to about $200. I started looking for a way to make some of the detail parts and have looked at my junk stuff to see what I can use. I could buy 2 Backmann 3 truck Shays (less DCC) for a bit less than all the parts were going to cost.
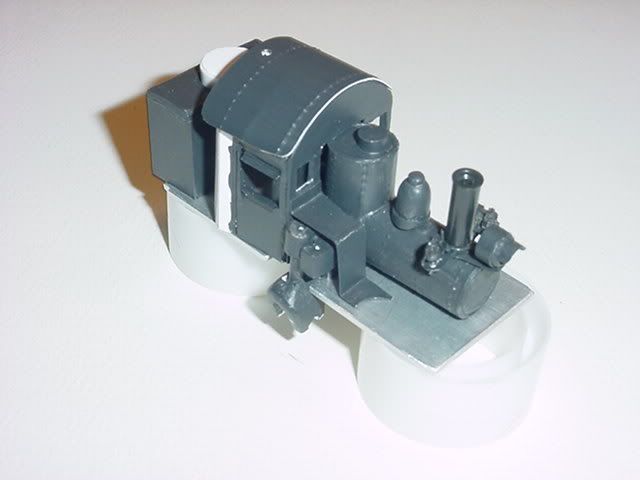
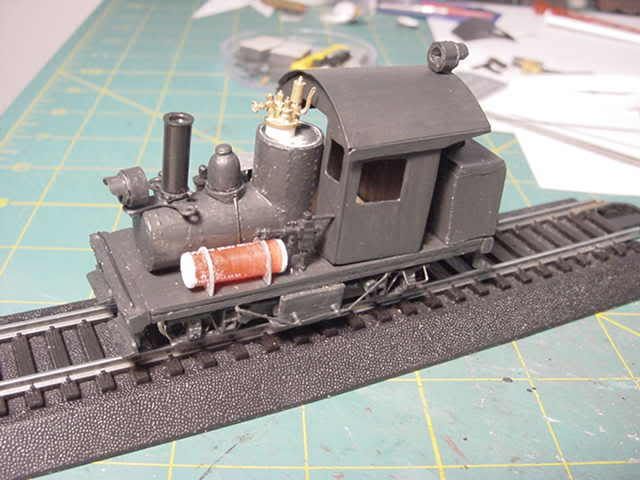
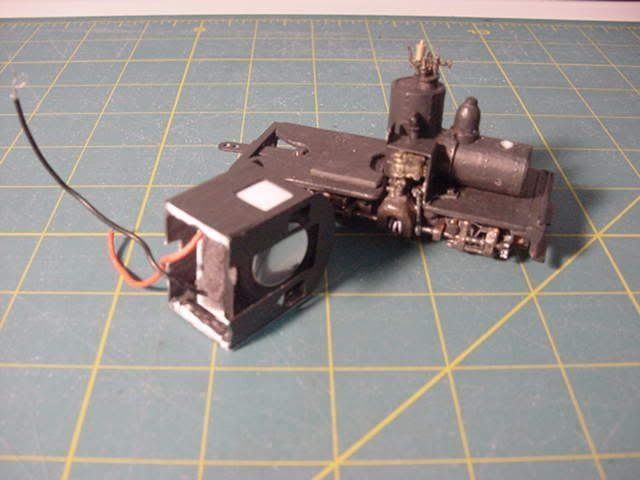
This picture was with a flash. That was the only way I could get the bell, headlight, generator and the bracket that those things sit on to show up enough to see them. The headlight will be wired for an LED. I am not sure a generator would or could be put on that bracket by the smoke stack. I have to check on that.
==============================
5
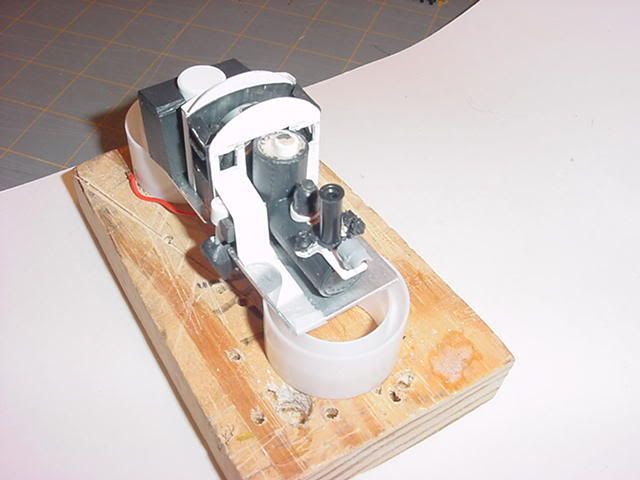
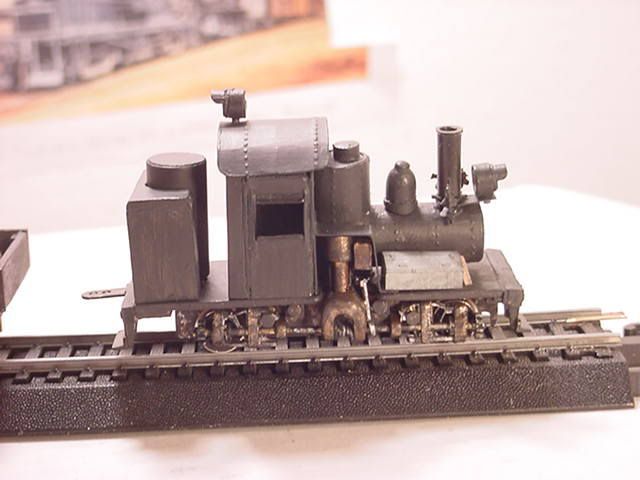
Here are a few better pictures of the top part of my Baby Shay.
1.
2.
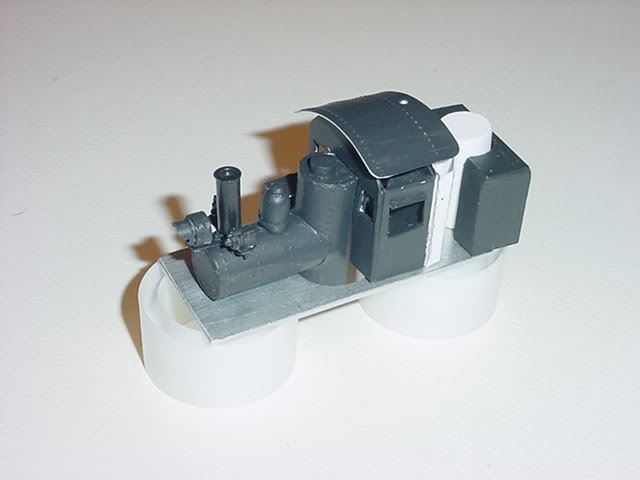
3.
I have been working on making the geared side of the Shay. It took me so many hours to get it made and rolling smooth. I almost went crazy. Had to push back and go for a walk to think about what I was going to try next. I about started over and built in a lot of different ways to adjust the line shaft, geared wheels, gears on the line shaft and two new supports for the line shaft. I made most of the connectors by taping holes (making threads) and using screws with lock nuts.
4.
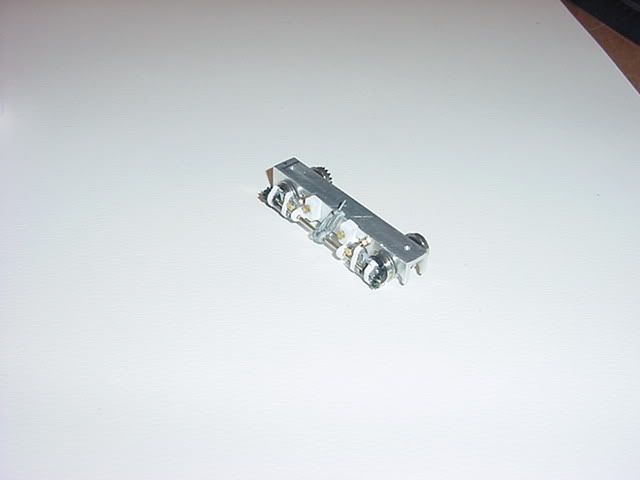
I will start on the side frames for the other side this week. This is the side where the wheels just roll so all I need to make are the side frames.
==
6.
have been trying to get my Baby Shay ready for its Tsunami Micro Decoder w/sound. I have the decoder and with a little luck it should be in and running by the end of the week.
I have been trying to finish up the under part of the chassis and adding a few details. I still have a bunch of detail parts to add and some weathering.
My little speaker is missing and I suspect one of my cats has taken it and made a cat toy out of it. I am still looking for it with no luck so far.
1.
2.

3.
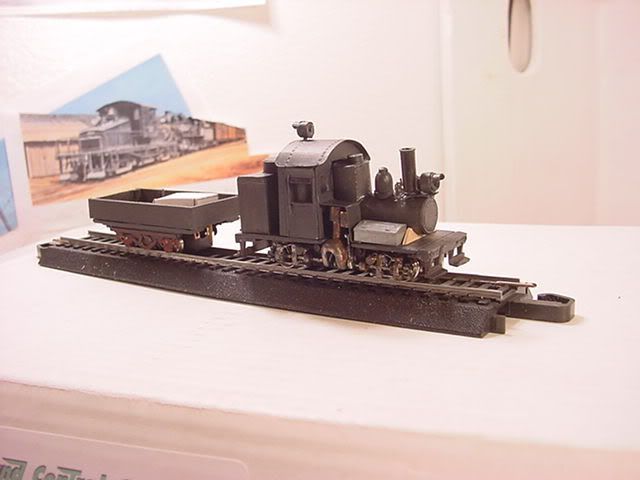
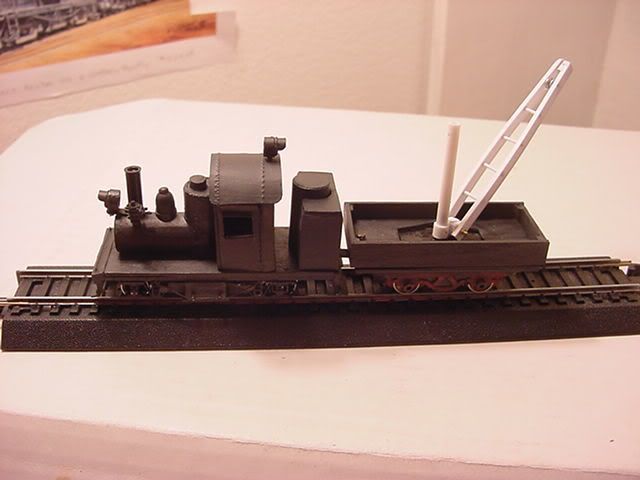
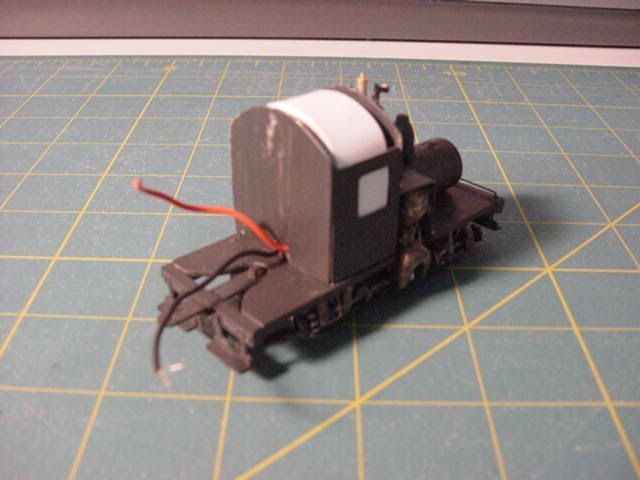
4. The little white box in the trailing car is the same size as the Tsunami Decoder.
=================
7.
I spent the last few days working on the part that no one will see. The under side of the chassis that holds it all together. That part is done and I can now pick the Shay up without the wheels falling off. I started work on the non-gear side frames and have finished them. I added a few other wire details such as the steps up into the cab, the ash removal thing and a wire brace, and a wire something on the front bumper thing. Someday I may figure out the names of these parts. I made all these parts from thin wire that came in one of my MDC Shay Kits. I still have a little more detailing to finish and at least one change to something I am not completely happy with.
1.
2.
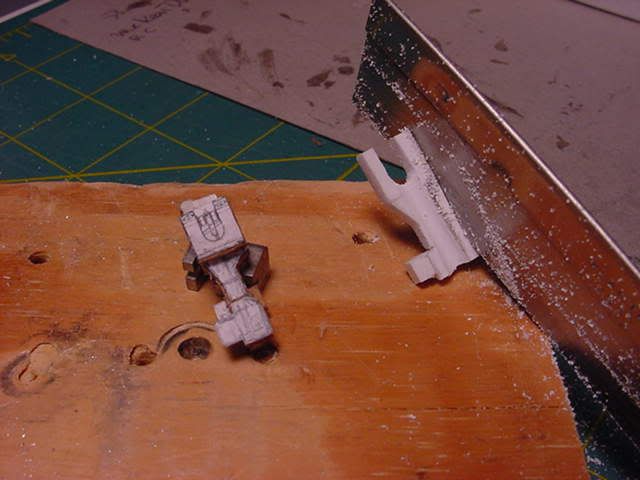
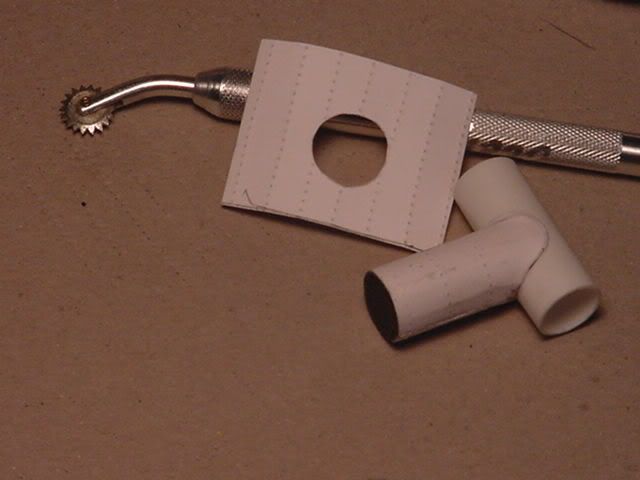
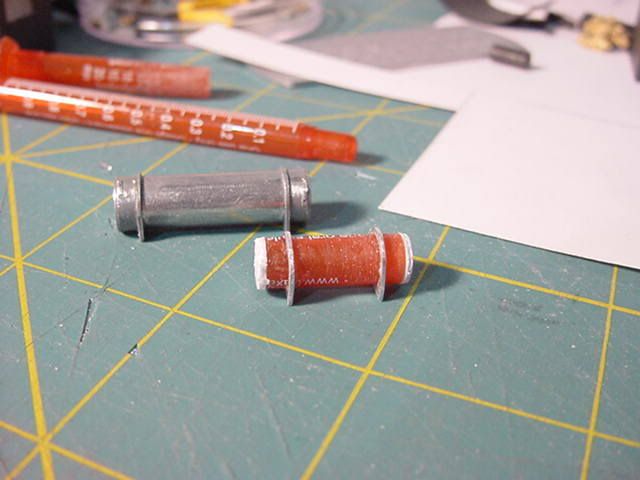
One of the things that I want in the follow along car is a crane. I needed a few really small pulleys and didn't have any. I came up with an idea for pulleys that I think is going to work just fine. These picture are more to show the pulley on the end of the crane. The pulley is 5/32" and will turn but I don't think it needs to for this car.
I am thinking about writing up a short "How To" for the way I made the pulleys. I think Warren and I talked about looking for small pulleys one night in Chat. If someone else has any ideas for making your own pulleys I would be interested in seeing how you did it. I can make the pulleys in 7 different sizes. The smallest is 3/32" up to 9/32".
3.
4.

================
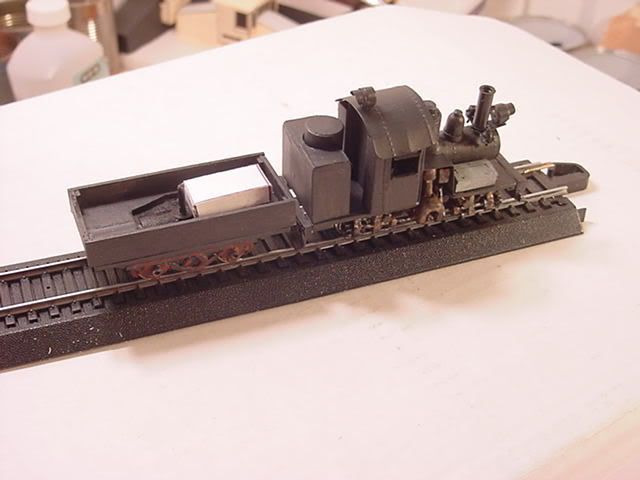
8.
I needed an air tank and the ones I had were either to big or to small. I decide to get the "punch" out again and see what I could come up with. I had a cat medicine dispenser about the right diameter for the tank size and punched 2 holes in my thin aluminum for the tank stands. I then filed the extra material away till they were nice and thin. Next I punched two holes in some thin sheet styrene for the tank ends. I did a bit more filing and glued all the parts together. Almost, instant air tanks.
1.

2.

3.
4.
==
Current pictures of my Baby Shay. You may notice a few changes. I came up with what I think is a better looking power cylinder. I also will run some plumbing from and to some of the detail parts before it is done. I have one more day to work on the details till it goes into the shop for some electrinical work. I am not gluing the details on until all the shop work is finished.
5.
6.

==============================
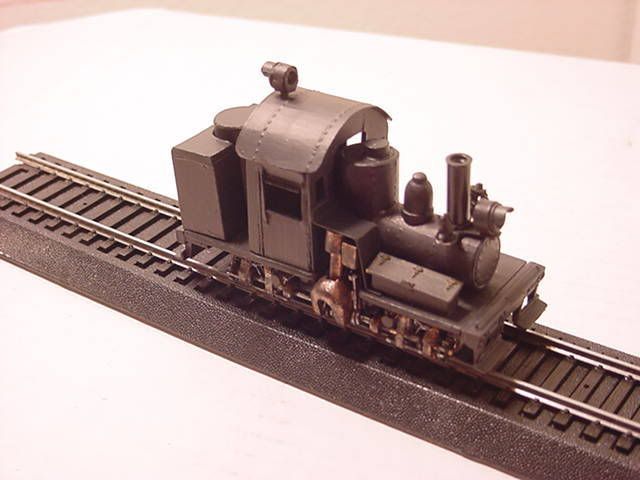
9.
The last 24 hours has been a "good news - bad news time.
The good news came about 1230 AM this morning when I found my speaker for the Baby Shay. It was necessary to make an enclosure for the speaker and when I went to put it into the cab it was just a little to big. I broke the glue bond on one side of the cab. I had to make a couple of modifications to the cab so it would fit. About 3 AM I was done, cleaned up and off to bed.
When I got up and went to my train store I got the bad news. The man that does the electrical work had cut the tip of his first finger on his right hand and could not install the Tsunami decoder etc. today. This is now put off till next week.
1.

2.
3.
============================================================================
Back at it:
1 July 2009
My first Tsunami sound DCC Decoder go lost. About a month ago I asked my local train store to order me another. For what ever the reasons the decoder has been very slow coming. The first one took over two months.
I have been working a lot the last week or so installing Radio Control with sound in several different locomotives. Last night about bed time I decided I would try a test install of RC w/Sound in my Baby Shay. This afternoon I got it all together and using one of the small Team Lois 7.4 volt batteries put it all on my test loop. The battery tested out at about 7.3 volts at the beginning of my test runs.
Everything worked. I was a bit surprised when the sound came on. I had tried this smaller battery before with the sound module and could not get it to work. Now it was working fine.
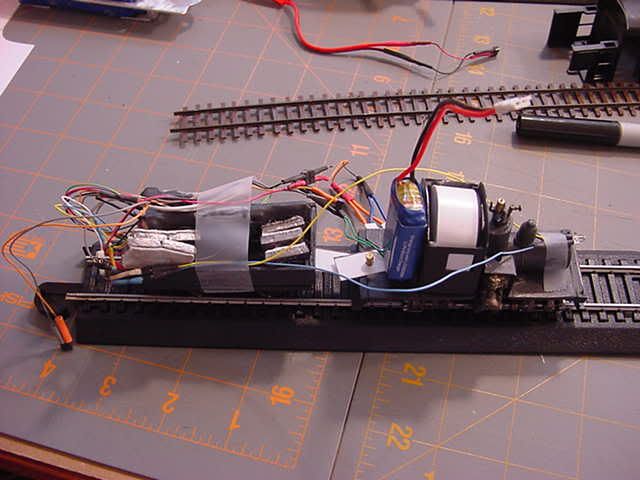
What you see in the pictures is everything used for RC sort of tied up and looks sort of a mess. This test was just to see if everything worked and the Baby Shay OK on the All-Trol RC System.
Runs fine, sounds great.
I ran the Shay for about 30 minutes. The sound started acting up so I checked the battery and it was down a lot. I put in a fully charged battery and played a bit longer and then took these pictures.
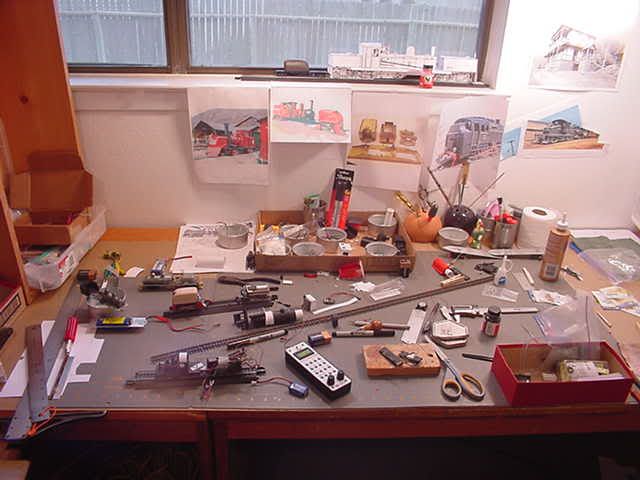
1. My workbench looks like a big mess. I call this Radio Control Central. If you look close you can see 4 or 5 engines in different states of completion in the process of installing RC to them.
 ]
]2. The next two pictures show a close up of the Baby Shay with all the RC stuff stacked on it or taped to it.
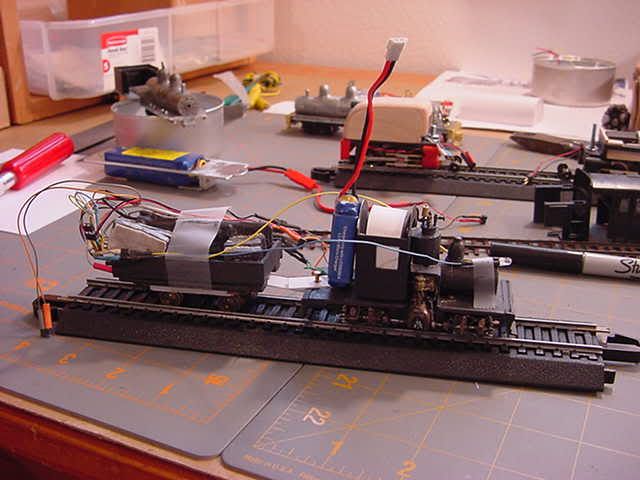
3. This picture is the Baby Shay running on my test loop.

Tonight I will work on the "follow along" car and see what it will take to make it big enough to hold the Receiver, Sound Module and one of my big 11.1 Eflight batteries.
I want to get it looking a bit more finished so I can take it to my HO Club Thursday night for fun run. The "follow along" car will look like some kind of MOW car.
No comments:
Post a Comment