Sometime back in October of 2007 someone on a yahoo train group posted some information on a new book by a French author and model train builder named Christian Cenac. He had written 4 other books about the French WW I trains that supported the trench style of warfare. One of those books was said to be full of scale drawings. The books didn't seem to be sold here in the US so I checked my "library books listing" and found one of the 4 titles. Two copies of one of his books were listed and were in libraries here in the US. I asked my library if they would try an Interlibrary Loan for that title. The request went out to the two libraries on 31 Oct 2007. A few weeks ago I got a notice that the request had been denied. I assumed that it was from both libraries. Then this past Monday I got another notice about a different book I had on request that did come in and that I could come and pick it up. When I got there they had two books. One book was "The French Book" and had come from "The Library of Congress". This book has 48 foldout pages of plans in 1/35" scale, many pictures and lots of text - in French. One of the locomotives was this think called the Crochat Locomotive. It is a gas / electric locomotive and was built to move train cars on the 60 mm gauge rail lines in support of the WW I trench fighting for the French.
1.
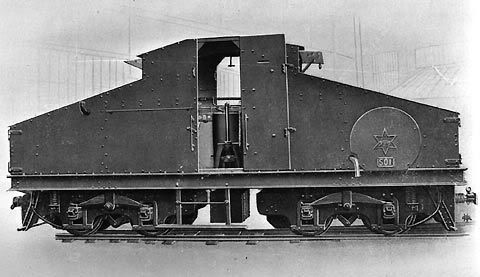
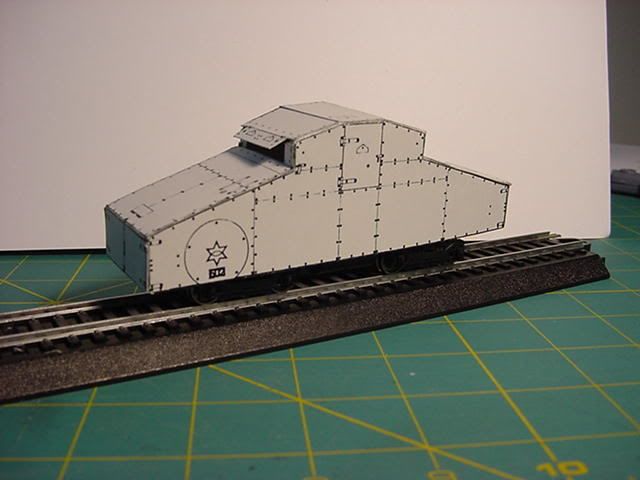
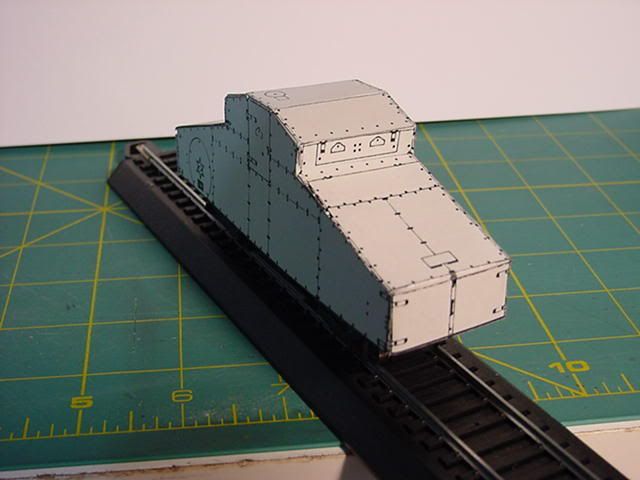
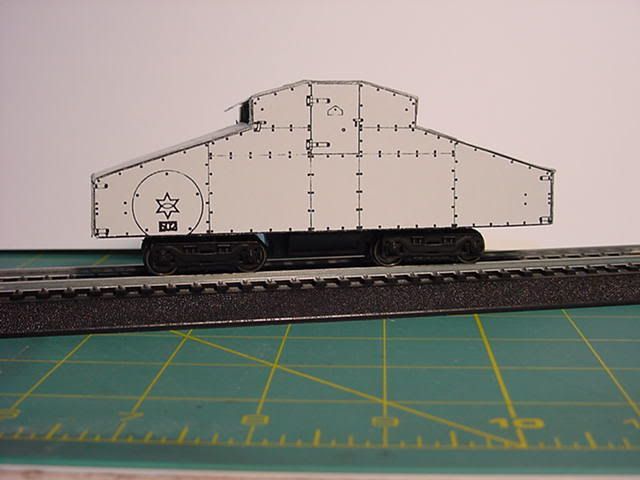
I liked that one and made a few copies of the drawing changing the scale from 1/35" to 1/48". It looked like it might be an easy On30 project. I made the first one out of card stock.
2.
3.
4.
3.
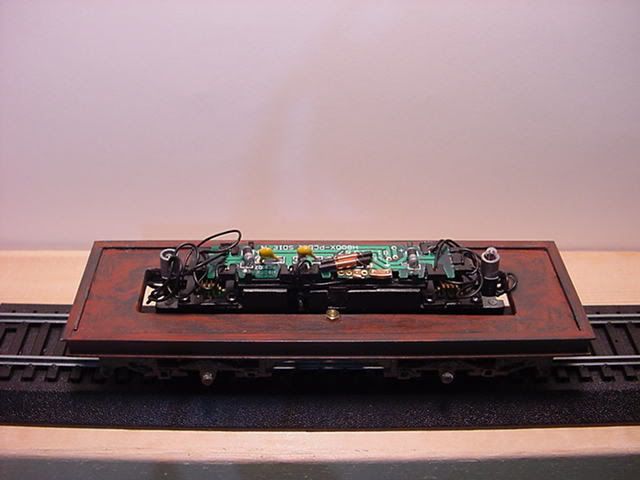
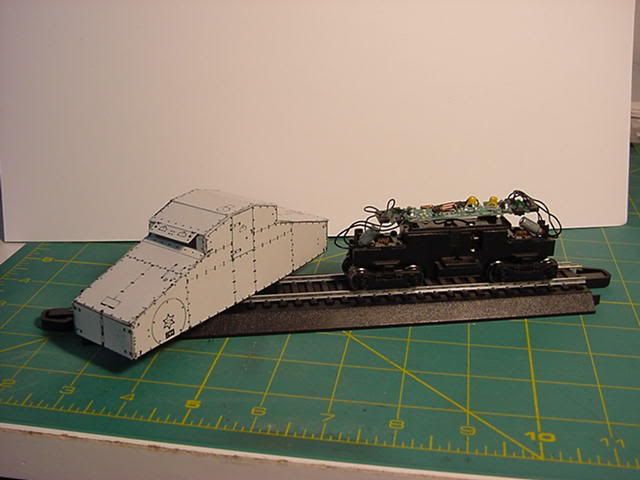
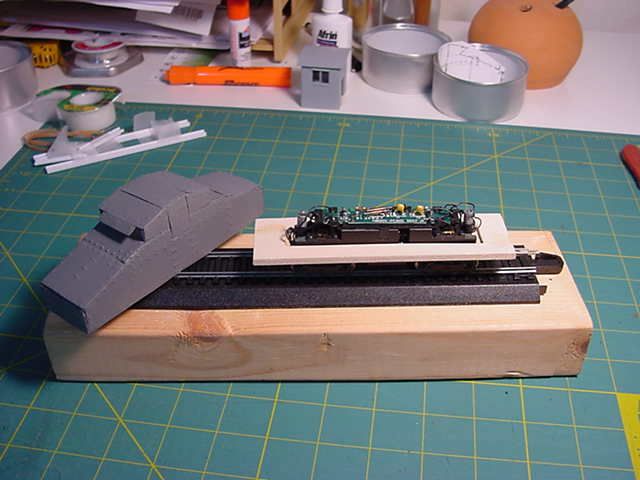
I have been slowly working on another project, a BVM conversion, and had a Bachmann HO - GE 44 Ton ready to use as the donor motor / chassis. I sat the mock-up on the 44 ton chassis and had a look. Looked close enough for me.
5.
6.
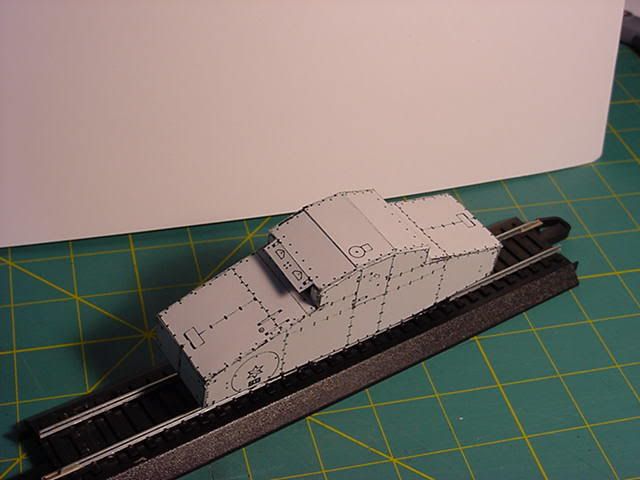
I have a number of pet cats and they generate a few empty aluminum cans each day. I have used these cat food cans for other non-train projects in the past and thought I would try using them for this Locomotive. It is also the first scratch built Locomotive I have ever tried to make.
7.
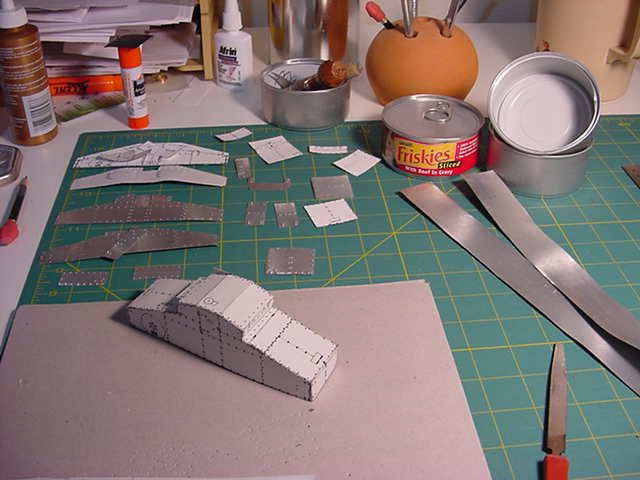
I glued the thin aluminum panels to the card stock body.
8.
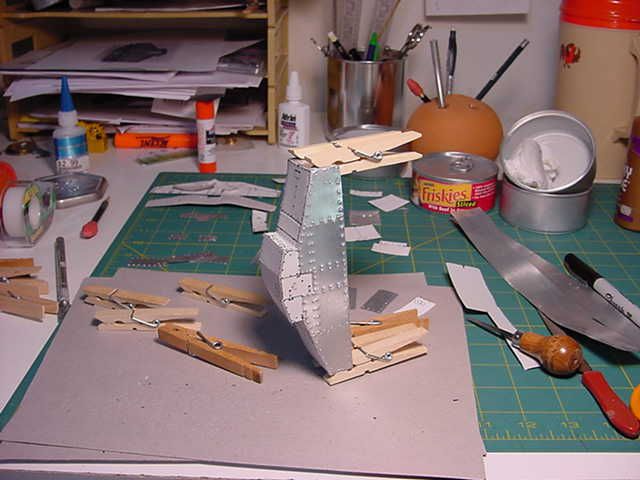
This seems to have worked OK.
9.
10.
Over the next few days I will be working on the frame for the Crochat locomotive and mounting it to the Bachmann donor. Then I will add a few other details and paint it.
I will add new pictures as changes occur.
The card stock / cat food aluminum can material worked well enough that I am sure I will be using this method for several more projects.
Disclaimer:
Some of you may be asking why I just did not use Brass?
I don't know how to solder, but I do know how to glue. I also have a steady supply of aluminum cat food cans.
Entry 2.
We are now a few hours into Christmas Day here in Texas so Merry Christmas to you all that do Christmas. Happy Holidays to all the others.
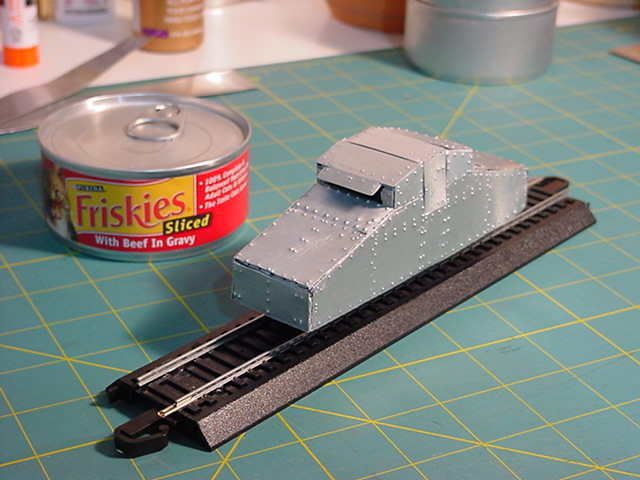
I sprayed a coat of primer on the Crochat Locomotive and started on the frame.
11.
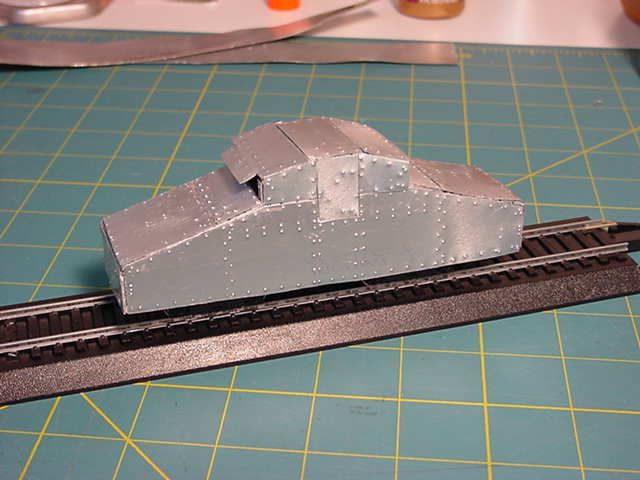
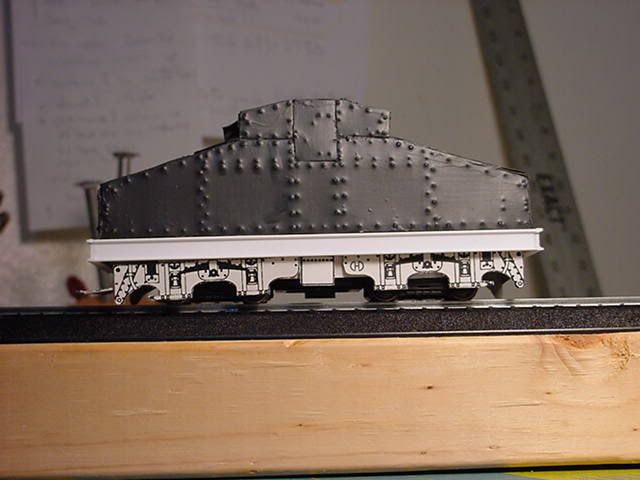
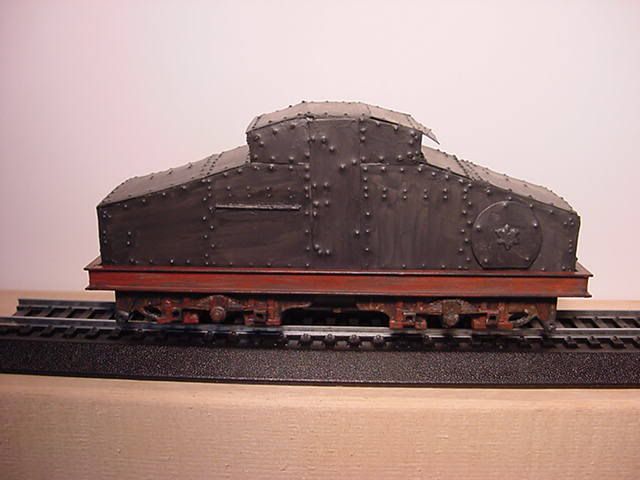
I am continuing to work on the frame and gave the Crochat Locomotive a coat of basic black.
12.

13.
This is how I hope the side rails turn out.
14.

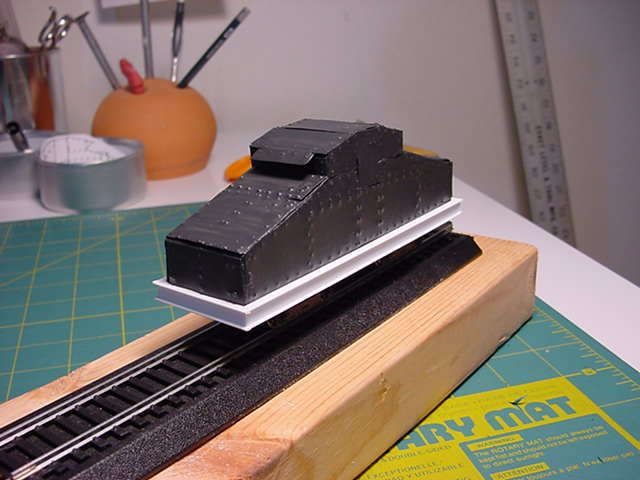
With the Crochat Locomotive body sitting on the frame.
15.

16.
Entry 3.
I have spent some time working on the side rails and with a little paint they will be finished:
1.

2.
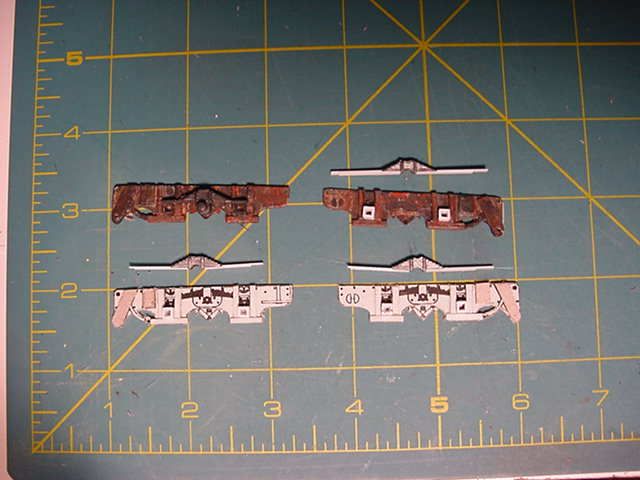
3.
4.
Entry 4.
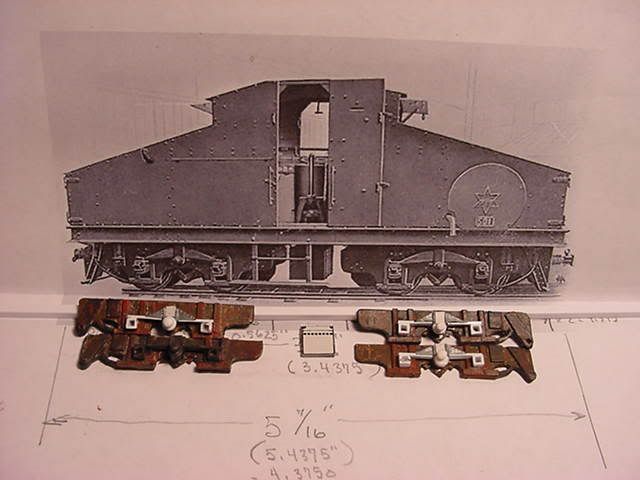
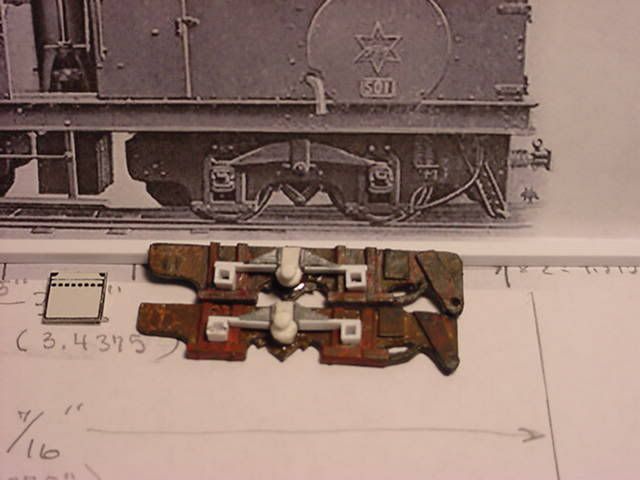
If you look at the picture with the prototype Loco and notice what is white looking - that is styrene. The springs are gray plastic parts from an old HO - I think - gas tanker trailer truck model. All the rest of what makes up the side rails is card stock. Each side rail is 5 of the side rail image glued on top of each other. Then I cut a few pieces of other card stock to make the parts that give it a 3D effect. Then I gave each side rail several coats of paint to make them a bit stronger. I have them all painted and also have the frame more or less finished and painted. I have the steps made but will wait about to last before I glue them on the frame. If I glue them to soon I am sure they will get broke off. I made what looks like a link and pin coupler from the picture also. I will add the hand rails and a few other detail items and I should be done with this one.
I had thought about making a simple mold for the side rails but I really don't plan to make more like this one. I also know a lot more now than when I started and if I do another one of this Loco the next side rails would have a bit more detail.
I will use this card stock method for the McKeen Car side rails but I might try and make a mold for them. I am referring to the 1/48" scale McKeens I want to make.
Entry 5.
Another step closer to being finished.
1.
2.

The motor unit is from the newer Bachmann "HO" GE 44 Ton Switcher. The chassis is made from styrene and wood.
3.